Silver Stoat Tube Fly
Before I explain the details and dressing of this fly I thought bit prudent to explain what sort of device that is needed to tie them.
I have spent many years looking for the ultimate tube vice and the truth is I have never really found it. Each type has it’s own good and bad points for each type of vice.
I have previously used a Norvise rotary which is a brilliant tool provided that you do not accidentally hit the lock function on it because if you do by the time it has registered in the brain the next thing to register is how pretty all those materials look floating to the floor!!
Need I say more?
This vice was fitted by a chuck clamp similar to that on a small drill to hold the bit in. I found that with this type of tube mount you could not set the materials properly and that it often deformed the tube itself.
I then tried and successfully used the HMH tube vice which can be easily attached to any regular vice. It is particularly good with bottle type tubes. The only problem was that the needles that fit through the tube do not always make it right the way through so you have to remove the plastic inner and replace it later when the fly is tied. O.k. if you want to add a cone head but otherwise a pain and an added expense as you have to buy the inner plastic tubing.
The other disadvantage is when you start to tie tubes in silly sizes such as 6mm and even smaller. Why would someone want to tie something that small you may ask?
Because they can be deadly is the reply.
The latest tool specific for the job is a needle-like device from Glasgow angling.
This is great for the job but do be careful when stretching out for materials as it really is needle-sharp. Ouch!!!!!!
The one thing that I have always found invaluable is a blind-eyed hook as it fits the vice without any bother and you can push on tight any tube of your choosing. When tied they easily can be pulled off (before you varnish the head though).
If you look at the picture you can see the main types of tube fly holders I have mentioned other than the chuck bit.
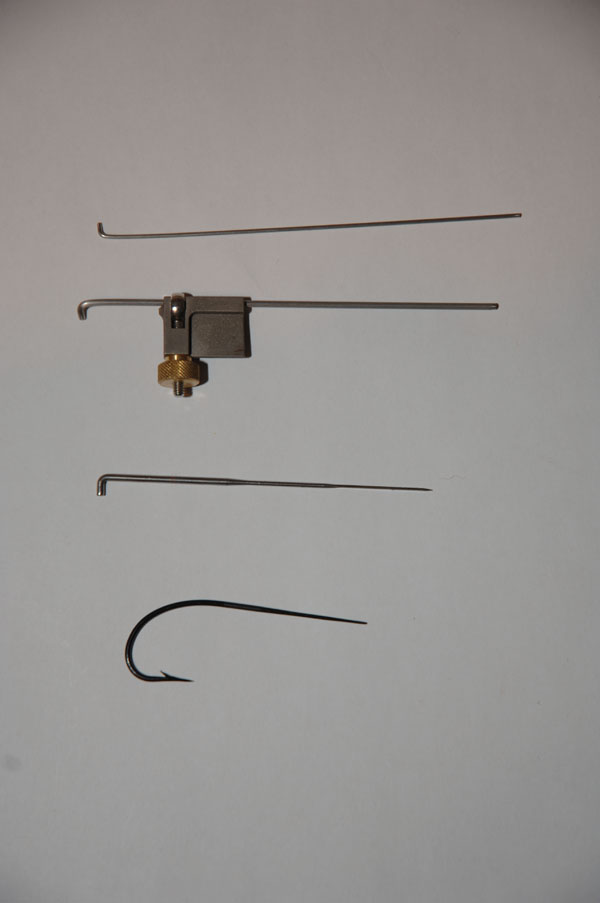
The sequence of tying detailed below is on a blind-eyed hook, and yes they are still available as any classical salmon dresser can tell you.
O.K. back to the job in hand. The Silver Stoat. A classic pattern for both salmon and sewin alike and successful on nearly all waters in Britain and Russia.
The dressing is as follows:
- Tube: Copper or Aluminium in size and length to suit fishing conditions. The example is tied on a 1″ aluminium slipstream tube.
- Tag: Fine oval silver
- Butt: Yellow silk floss
- Rib: Fine oval silver
- Body: Silver mylar
- Wing: Black squirrel or black bucktail in larger sizes.
- Silk: Black 6/0
- Head: Black
First off attach the tube to the device of your choosing.
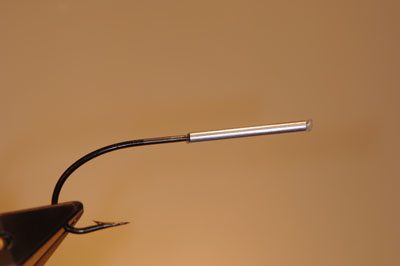
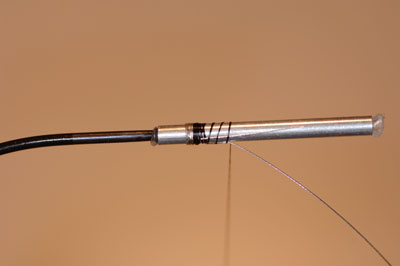
Now attach your silk at the rear end of the tube with a jam knot

Attach the tag material and move the silk back towards the head.
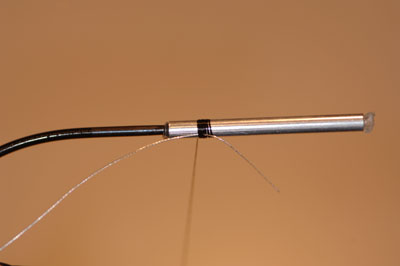
The idea of the tag is to stop the butt of coloured floss from sliding off the tube so the tag has to be tight. To ensure that it does not slide off wind it over the thread bed towards the head of the tube for 5 turns and tie off with the silk. Do not cut the tinsel yet.
In open turns take the tying silk forward for 4 to 5 mm. Note all the waste materials should be tied in on the underneath of the tube shank.
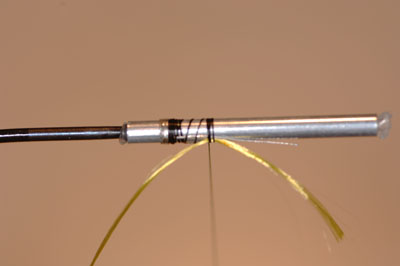
Take a length of Yellow floss silk and tie it in on the underneath of the shank and wind it forward to the tag and back to the tying in point and tie off with the tying thread. Again do not cut off the waste but tie it in underneath the shank just short of the head. It will ensure an even underbody that will make tying in the silver tinsel so much easier.

A word of warning. If your fingers are not clean then they will tarnish the silk. The only way to keep it shiny is to wear silk gloves. Tie in the ribbing material and tie in the waste the length of the shank and cut it short of the head.
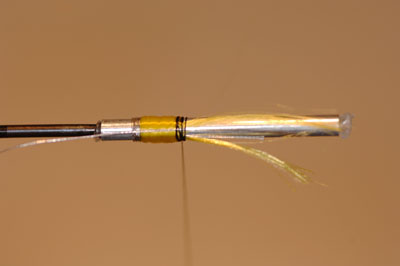
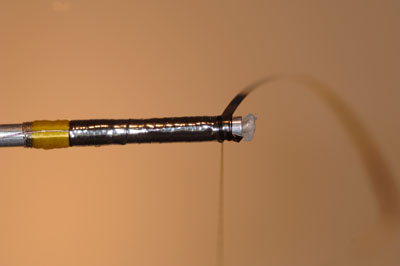
Take the tying silk to the head of the tube and secure down all the waste ends of silk and tinsel. At the head tie in the mylar tinsel. Remember that if it is dual mylar then it is tied with the underside colour facing you i.e. in this case the gold side faces you as you want a silver body.
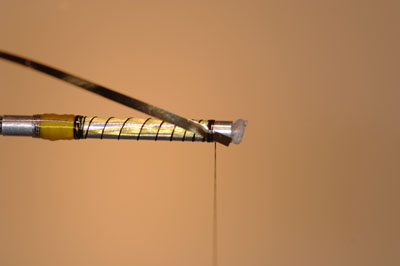
The above photo shows how everything is tied down and smooth. Take the mylar tinsel and wind it down the tube in touching turns to the yellow silk butt and back again to the head. This is known as a double layer and although uses more material gives a smoother body if done correctly. Tie off at the head and remove waste. Rib the mylar with the oval tinsel in open turns and tie off at the head. Remove waste.
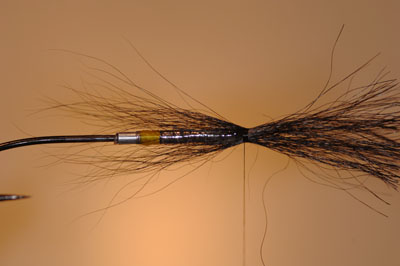
Select an amount of hair for the wing (in this case black squirrel) that will be sufficient to lightly cover the whole of the body. When I say lightly I mean half the amount you have already got in your hand at least.
Make sure the tips are relatively even and that the underfur has been brushed out of the butt ends. Take the hair and measure it’s length to the body of the tube. It will need to be long enough to cover the treble when it is attached. Now push the hair against the tube and tease it around the shank of the tube. and take a turn or two of silk to stop it moving.
You can then check that it is covered properly if not then by applying pressure with the thumb and forefinger of the left hand again tease it around the shank. Do not try and rush this. When happy secure with more turns of silk.
With the sharpest scissors that you have removed the waste hair tight to the silk turns. If you try to cut off too much at once it will all come loose and will be a disaster. A little at a time is the answer.
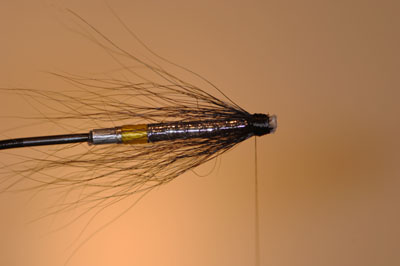
Tie in the waste ends and form a neat tapered head. Whip finish and varnish.

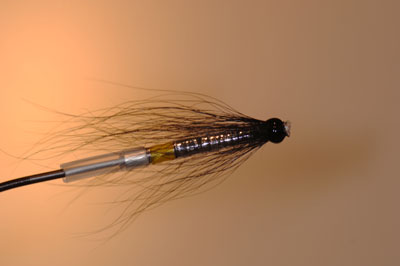
The finished fly. One to always has in your box.
If you get any problems then just contact the forum.
Tight lines.