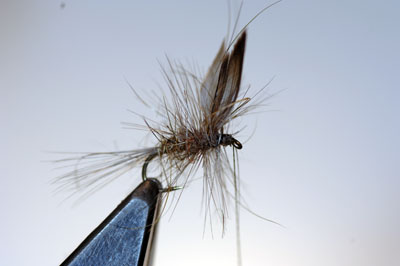
Gold-Ribbed Hare’s Ear Dry Fly
This is a great all-round dry fly pattern and can be fished from size 20’s up to 10’s. I know a number of anglers who fish with nothing else but this fly just a change of size to match the hatch.
You do not necessarily need the wings in this pattern but by putting them in the tying sequence you have the choice. Remember it’s your fly and you can do with it what you like.
I have deliberately made this pattern scruffy. It is in my nature to change things. Trout like scruffy and so do I. Tidy catches anglers…scruffy catches fish.
The dressing is as follows:
- Hook: Any fine wire down the eye of the appropriate size to the hatch. This one is a 14.
- Silk: Olive, yellow or black
- Tail: Medium Dun Cock hackle fibres
- Rib: Fine Gold Oval Tinsel
- Body: Dubbed Hares ear face fur.
- Wing: Paired mallard wing slips.
- Hackle: As the tail
First off connect your silk to the hook shank with a jam knot.

The wing is tied in first so take the silk and wind it to the two-thirds point on the hook shank as shown.
Know to take your wing slips and put them together ensuring that both turn outwards away from each other. Align the tips and place them in-between the thumb and forefinger of the left hand. Measure and adjust the grip so that the wings will be as long as the hook shank. I like the longer fibres of the wing slip to face forward so ensure that they are on the underside ready to be tied onto the shank before you start.
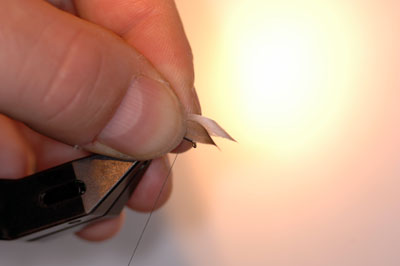
Now take a grip of the wing slips and with the bobbin in your right hand take the silk over the top of the slips in a pinch and loop technique. This means that no silk touches the top of the wing slips just yet.

This is the import bit – take the silk around the base of the hook shank and then gently release the loop of silk and pull it tight by pulling upwards with the bobbin. This action will compress the slip fibres together and keep then on top of the hook shank. As the fibres compress you will see the points of the wing rise slowly. If you do it too hard or change the direction, the wings will move around the shank or worse will be sliced by the thread.

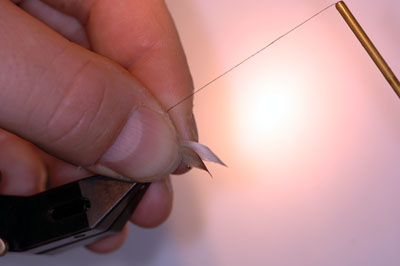
Take two more turns to secure the wing and then release the waste ends. Secure with further turns down the hook shank on the waste only. Do this carefully so as not to spin the wings off the top of the hook shank.
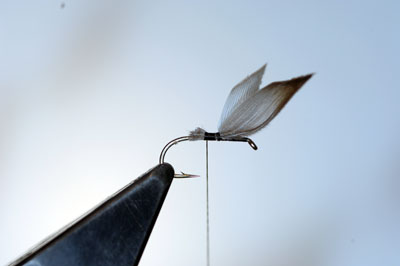
Remove the waste sit back and take a breath and give yourself a pat on the back for a job well done. If you find the wings are still off the top of the shank gently twist them back with a pinch grip of thumb and forefinger.

Strip off the fibres for the tail and tie them in. Remember the tail length is the same as the hook shank. Tie in the rib and take the silk forward to the front of the wing slips and tie in the hackle.

Take the silk back to the tail and get ready to rub your dub!

The way I intend to dub this fly is with the use of sticky dubbing wax. This allows for a spikier body with hairs pushing out everywhere. Not everyone’s choice I know but it is very effective. Just run the wax over the thread for about three inches then take your dubbing and just touch it to the waxed silk. Trust me it will stick to it in short and long strands. Now wind the dubbed thread around the hook shank taking the dubbed thread around the wing base and then back to the rear of the wing.

Now wind on the rib in open turns and tie off behind the wing. Remove any waste ribbing material.

Wind the hackle in turns back from the head to the rear of the wing. Tie off with the silk thread and wind the thread through the hackle to the head of the fly.

Whip finish and varnish the head.

Here is the finished fly head-on. I have shown it from this angle just so that you can see how important the proportions of the flies are.
Tie some and try them. If you have any questions or need further help contact the forum.
Good fishing.