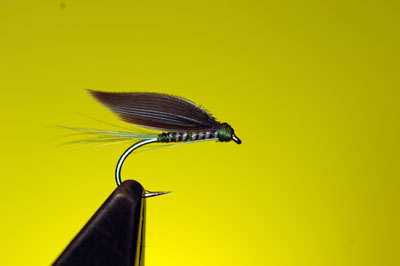
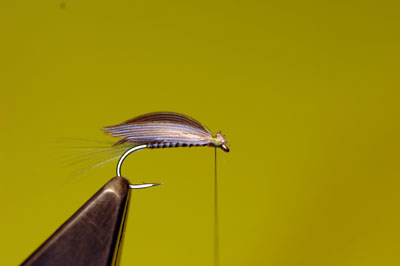
Dark Olive Wet Fly
This is a great early season wet fly pattern for when the Dark Olives are hatching. It is also the basis for many other wet fly patterns where all that changes is the colour of the cock hackle.
The dressing is as follows:
- Hook: Kamasan B175, size to suit the natural (14’s or 12’s)
- Silk: Olive 8/0 or 6/0
- Tail: Dark Olive dyed cock hackle fibres
- Body: Peacock eye quill feather fibre
- Wing: Matched paired mallard duck wing slips
- Beard: As tail.
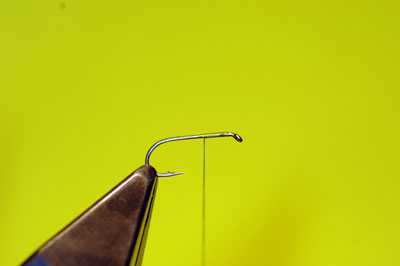
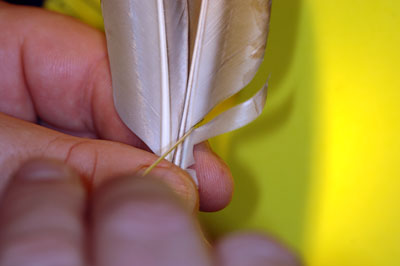
First of all tie on your olive silk tying thread with a jam knot and wind it back to the rear of the shank.
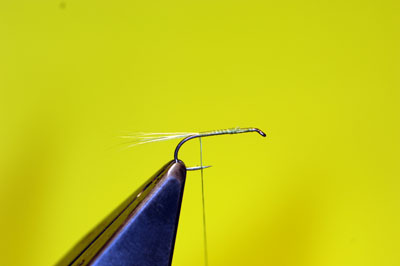
Now tie in a few fibres of the cock hackle in as a tail. Remember the tail should only be as long as the hook shank to maintain correct proportions.
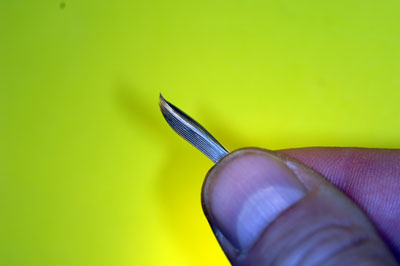
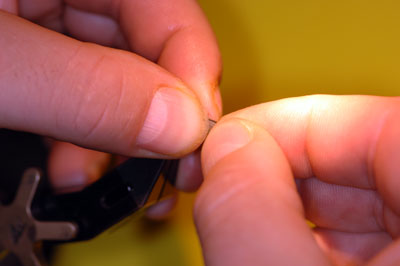
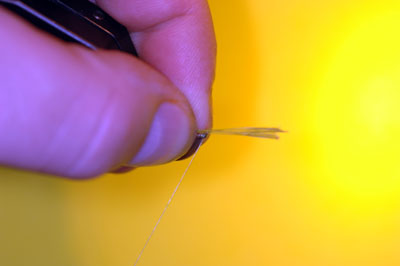
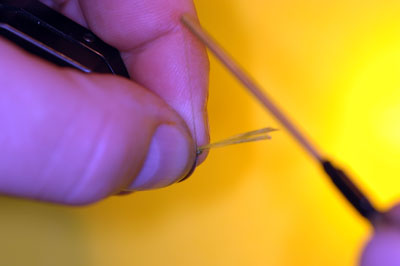
Select a quill fibre from the eye feather of a peacocks tail as shown below.
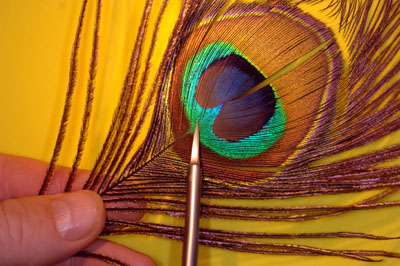
There is not much of this fibre to work with so the bigger the eye feather the longer the quill fibre will be. This is something to remember when you are selecting feathers to buy whether or not they are dyed or still in natural form.
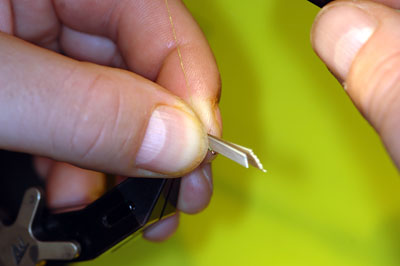
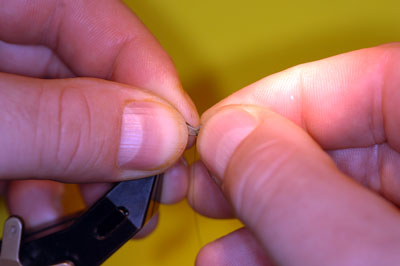
To prepare the fibre to tie in you will need to strip away the small fibres from the quill. I find the best way is to scrape it off between the nails of your thumb and forefinger. If you haven’t got any nails left as you have just chewed them off at the thought of tying this fly! then place it flat on the tabletop and rub it gently with an old school eraser. Be gentle with the fibre or else it will break and cause you to start chewing those fingernails again.
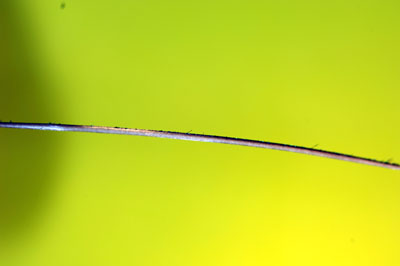
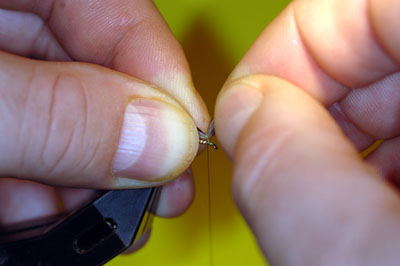
The fibre will want to look at the picture above. A good example will show the two-tone colouring going from dark on one edge to light on the other. Tie in this fibre on the underside of the shank.
It is a matter of for you to decide at this point whether or not you want to use a small and I mean small amount of head varnish on the underbody to help the quill fibre to remain in contact with the underbody. It helps prolong the fly’s life when chewed by trout but if you use too much it will make the fly look awfully messy. My own preference is not to bother but it is your fly to do with as you wish.
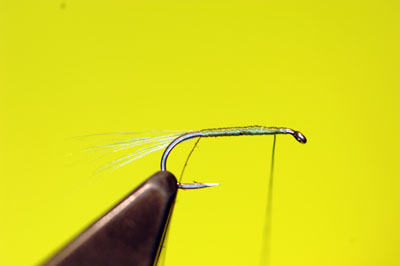
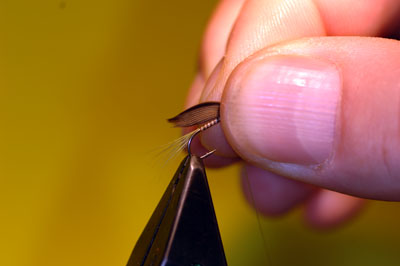
The body is wound from the tail to the head in touching turns. I find it easier to only use my fingers rather than with hackle pliers. If you try both ways you will find out soon enough why hackle pliers are to be avoided.
The technique that suits is to turn the quill fibre over the hook shank and push it down with the forefinger of the left hand and by holding this finger on the top of the shank the fibre will point downwards and can then be grasped easily with the thumb and forefinger of the right hand which will then lead it to the top of the hook shank where the whole technique is repeated until the body is formed. Remember practice makes perfect.
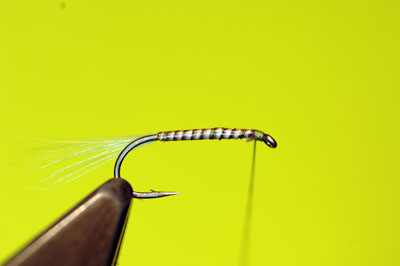
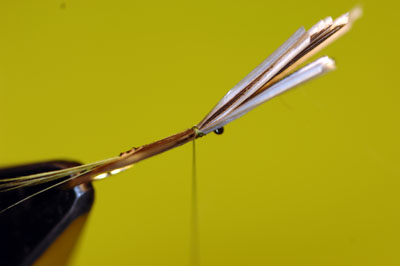
Take the Mallard wing slips and select a slip from each side. I find this easily done with the use of a bodkin or dubbing needle.
Now put the two slips together concave inwards and match up the tips ensuring that the longer edge is uppermost.
Measure the length of the wing. It should only be slightly longer than the entire hook length. We are now entering the stress zone as the tying of the wings correctly has seen adults cry and coaches weep. Seriously, it’s not difficult if you follow the instructions below.
Having measured the correct length for the wing grasp it above the hook shank in the left hand between thumb and forefinger. This can now be known as the grip of death for that should be the only reason why you should relax this grip at this time! Now take the bobbin and form a loop of silk which you then trap in the grip of the death fingers and then form another so that you have two such loops.
Allow the bobbin then to hang below the tying in point but keep the loose loops still gripped between those fingers. Now take hold of the waste ends that point out over the hook eye in the left hand and start to bend them gently upwards. This will form a slight valley in the mallard wing slips. Keep a firm grip of those slips that are secured in the left hand but now allow the open loops of silk to tighten. This is done by relaxing your grip on them and allowing the weight of the bobbin to tighten them onto the wing slips. The weight of the bobbin should be heavy enough to do this but make sure that both loops have tightened down onto the wing slips. Now to encourage the duck fibre to compress and not split keep lifting gently the waste fibres which are still being gripped in the right hand
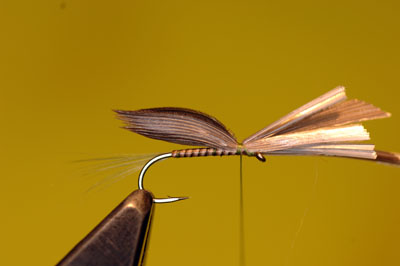
You should now have a view as the photograph below.
When you are happy that you have gently compressed the fibres you may now release the waste ends with your right hand and take hold of the bobbin and tighten the silk by pulling the bobbin downwards. Then make one additional turn to secure the wing. Under no circumstances do you now put any silk turns back onto the wing slips themselves. Now release the death grip and let the blood flow back into those fingertips and admire those beautiful wings?
Now check that as well as looking lovely from the side the wings are lying straight down the hook shank when viewed from above.
Now its time to get rid of the waste fibre. I cannot stress enough how important it is to use the sharpest of scissors otherwise the whole wing will twist as you cut.
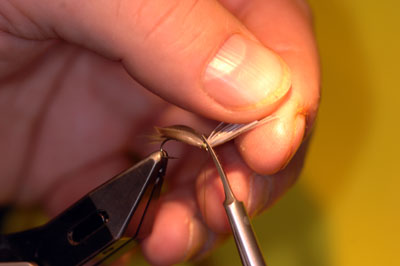
 Now select a few fibres from the same source as the tail and tie them in as a beard. Remember though if you put a turn of thread over the wing slips they will be destroyed.
The best way to get these beard fibres sited properly is with a pinch and loop technique.
Cut off the waste and form a neat head with the tying silk.

I hope that it brings you success
If you have problems or want further instruction on the techniques involved in this tying then just contact the forum.
Good tying.